
Each layout specifies a portion of a screen you may wish a window to occupy. A Basic Layout defines the area the window will occupy with a simple grid. The number of squares in the grid can be configured in the preferences or even specified for each layout.
For this example we will use the default grid. You can create as many layouts as you like to suit the way you use your apps. For example, you may commonly want to work with your word processor occupying a large area on the left of your screen and your web browser occupying small area pin the right. Lets walk through how to create this configuration.
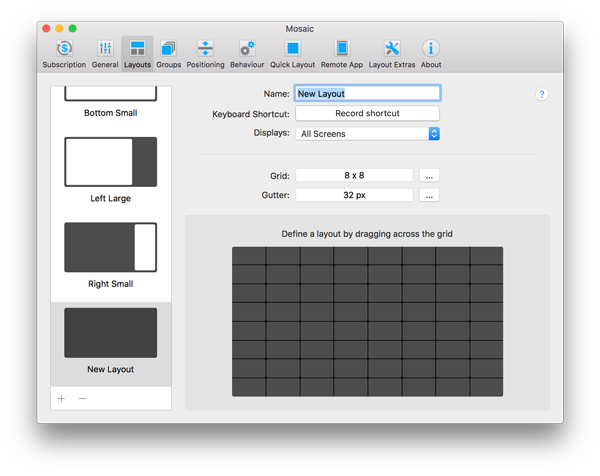
To create a layout click the Mosaic status menu icon. From the menu choose "Preferences..." and select the "Layouts" tab. You will see a screen similar to this:

The left portion of this screen lists all the layouts you have currently defined, regardless of whether they are grouped or not. The right hand side shows the properties of the selected layout.
To add a new layout click the + button at the bottom left of the window.
Select "New Layout" to create a new Basic Layout. The layout will be selected in the list:
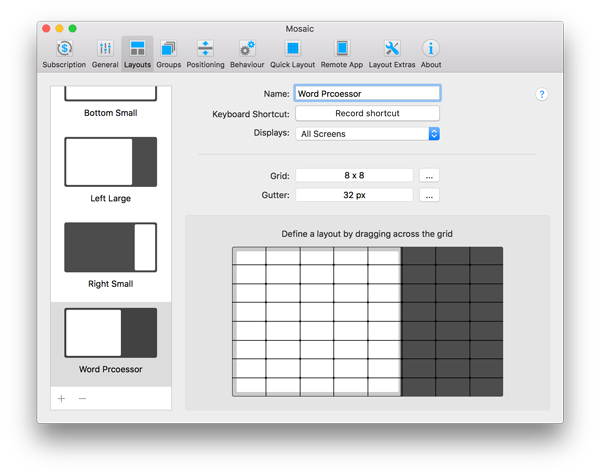
Type a new name for the layout. I will call this one "Word Processor".Next we click and drag in the grid area at the bottom of the right hand side, the white area drawn is the area the window will occupy relative to the screen when the layout is applied later. The grey area around the edge shows the gutters, the window will occupy the white part:
Thats it, we created a layout which will now appear when the "All Layouts" group is selected. If you wish you can assign this layout to other groups by ticking it in the Groups tab.
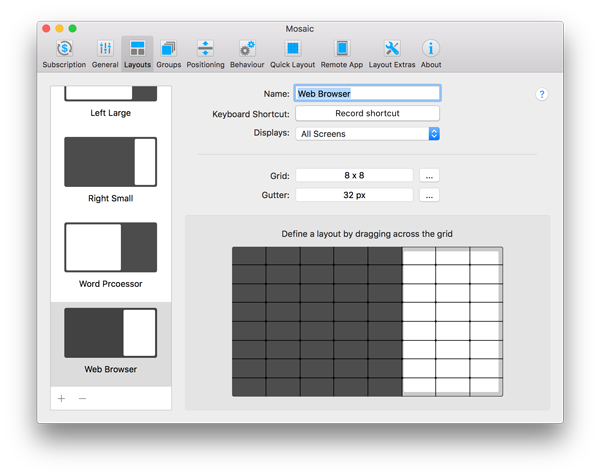
Now we can repeat the process to create the layout for our "Web Browser". So in summary we:
- Click the status menu icon for Mosaic
- Select "Preferences..." from the app menu
- Click the "Layouts" tab
- Click the "+" button and choose "New Layout"
- Type the name for the layout "Web Browser"
- Drag the area we want the window to occupy on the grid
- Optionally add the layout to any groups on the "Groups" tab
Here is our second layout:
All done, it takes a few seconds to setup a new layout. Don't forget, you can customise the grid for a layout to achieve the results you need. The gutters can be configured globally in the "General" options and if you wish you can override these individually for layouts for even greater customisation. If you specify a gutter of 0 for both internal and external gutters, layouts will touch the edges of the screen and touch windows placed adjacent. We prefer to have a gutter to give a bit of space around our windows, but the choice is yours.
Comments
0 comments
Please sign in to leave a comment.